
The purpose of this application note is to provide instructions on how to upload, install, and configure ASTi created model files (.TGZ) onto your Telestra server. The steps include:
On the workstation or computer on the network, open the Telestra web interface by typing the Telestra server Eth0 IP address in the web browser's address bar, as follows:
http://xxx.xxx.xxx.xxx/
A security warning will appear in the browser, select “Ok.”
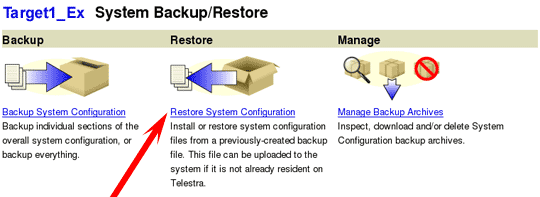
Navigate to Configuration > Backup Restore. You will have to login to the Telestra web interface with a valid username and password.
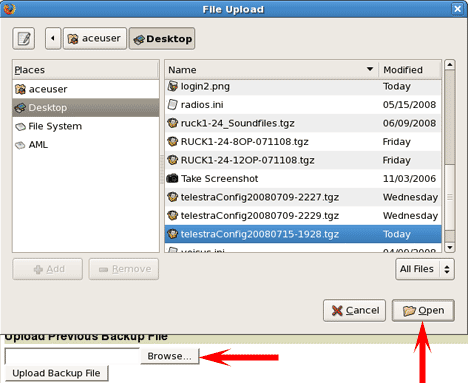
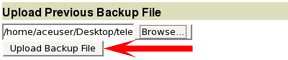
At the bottom of the screen you will see “Upload Previous Backup File.” Select the “Browse” button to browse and select the file on the workstation or computer. Then select “Open.”
Select the “Upload Backup File” button.
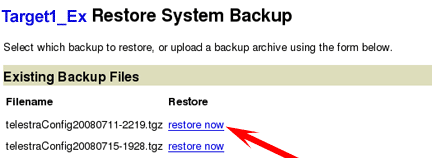
The new file will now appear under “Existing Backup Files.” Select the “restore now” link next to the file name.
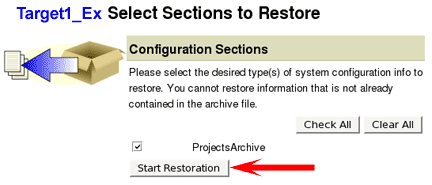
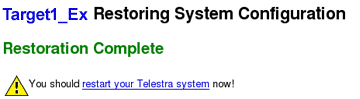
The next screen asks which files you would like to restore, check the box for Projects Archive and select the “Start Restoration” button. Wait for the confirmation screen to display “Restoration Complete.”
Select to “restart your Telestra system.” Then select to reboot and wait as the system reboots. This will take approximately two minutes.
Upon reboot, the Telestra web interface will automatically redirect to System > Status.