
This note describes the software update process for Telestra software v2.4-6. ASTi recommends this software update for all Telestra 2U servers running Telestra 2-series software, v2.4-5 and earlier.
Hardware Note: Telestra 2U hardware refers to a 3.75-inch height, 19-inch width rackmount chassis form-factor.
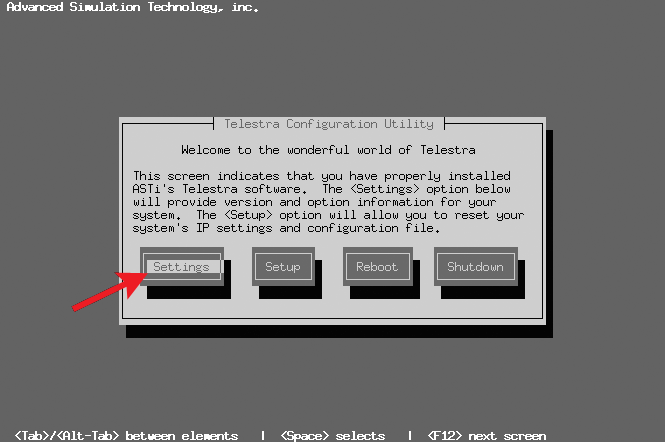
Software Note: Telestra 2 software provides remote management features and optional radio simulation services (e.g., HLA, SATCOM, HF / ALE) when used in conjunction with ASTi DACS. The Telestra software version is displayed by the Telestra Configuration Utility. Press the 'Settings' button to view the Telestra software version.
The Telestra v2.4-6 software update provides a critical fix to the Telestra web interface DACS File Maintenance utility. The DACS File Maintenance utility, located in the Telestra web interface under the DACS Systems / File Xfer tab, allows users to navigate the DACS system file structure, download files for archiving, and upload files to the DACS over the network. Telestra software v2.4-5 and earlier may not properly perform DACS file uploads. The Telestra web interface may prematurely report that file uploads are complete. Telestra v2.4-6 fixes this problem.
Complete information on installing Telestra 2 software can be found in the Telestra v2.4 User Guide and Telestra Cold Start Procedure; see especially Chapter 5.0 "Cold Start Procedure: 2U & 4U Telestra Systems".
Warning: The Telestra software installation will completely overwrite all existing information on the Telestra system. You must back up the option file and the configuration file before installing the new software. You must upload the files back to the Telestra after the software update. Complete instructions on downloading option files and configuration files can be found in the Telestra v2.4 User Guide.
From the Telestra web interface Menu / Mgmt / Telestra Options File Management, select "Click any [option] filename to download". You will re-install this file (upload it) to the Telestra in a later step.
From the Telestra web interface Menu / Mgmt / select "Download Configuration File". You will re-install this file (upload it) to the Telestra in a later step.
Note: Before commencing with the Telestra software installation, ensure the "Boot Priority" is set in accordance with the BIOS instructions outlined in Telestra v2.4 Cold Start Procedure. Otherwise, the Telestra system will not boot from the CD-ROM and automatically enter the installation routine.
From the Telestra web interface Menu / Mgmt / Telestra Options File Management, select "Telestra Options File Management", browse to find the file and select "Upload File".
From the Telestra web interface Menu / Mgmt, select "Upload Configuration File", select "Start Upload", browse to find the file and select "Upload File".
You have now completed the Telestra software update.