Telestra App Note
Change the screen resolution for Studio 5.X and earlier (#89)
Depending on your monitor type and network switch, your Studio screen may look distorted. The following instructions describe how to adjust your monitor's screen resolution on systems running Red Hat Enterprise Linux (RHEL) and Studio 5.X and earlier.
To change your monitor's screen resolution, follow these steps:
- On the development workstation, open Studio.
- To switch to the command line, press Ctrl+Alt+F2.
- At the prompt, log in using the following credentials:
| Username |
Password |
| aceuser |
aceuser |
- Run system-config-display.
- Log in as root using the following credentials:
| Username |
Password |
| root |
abcd1234 |
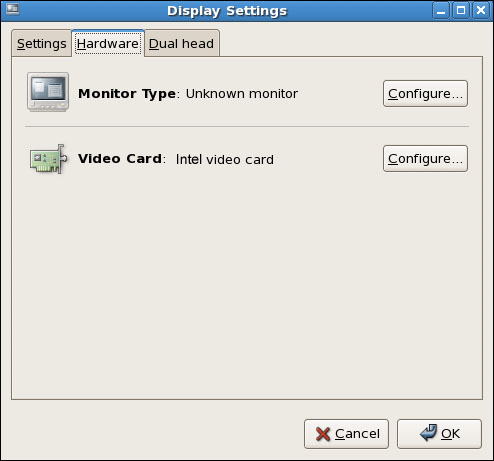
- When Display Settings opens, go to Hardware.
-
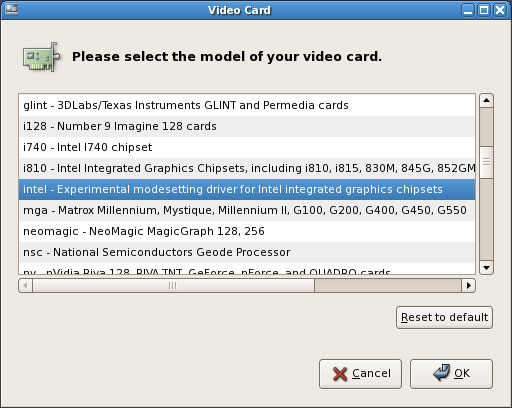
Next to Video Card, select Configure.
-
On Video Card, select intel - Experimental modesetting drive for Intel integrated graphics chipsets.
- Select OK, and close the display settings. Select OK again.
- In the terminal prompt, enter system-config-display.
- When Display Settings opens, go to Hardware.
- Next to Monitor Type, select Configure.
- Choose a generic monitor that supports the same resolution as your monitor.
Important: Do not select a specific monitor, which is not as compatible as the generic selection.
- Select OK, and close the display settings.
- At the terminal prompt, run system-config-display.
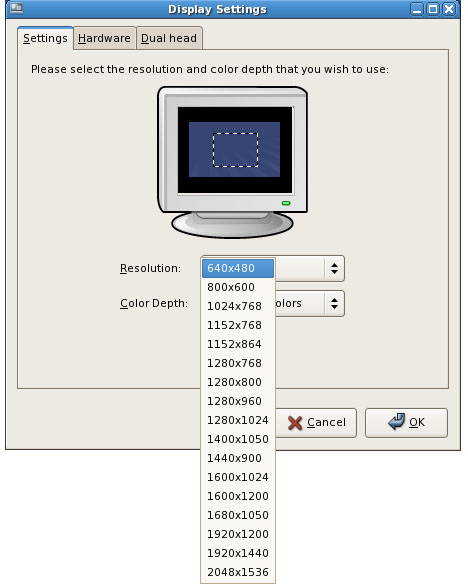
- When Display Settings opens, go to Settings.
-
Select Resolution, and choose a resolution that your monitor supports. ASTi recommends 1920x1280 for most monitors.
- Select OK.
- At the terminal prompt, run reboot.