
Telestra supports the TDL/Data Bridge feature through a third Ethernet port which serves as a host interface. The general operation of TDL remains the same as under DIS, except that the DACS exchanges PDUs with the Telestra unit instead of with the host directly. Likewise, the host exchanges PDUs with Telestra instead of directly with the DACS. Use of TDL with Telestra requires Telestra version 1.6 or higher, Model Builder version 4.06 or higher, and version 3.1 or higher of the ASTi SOM. Telestra must be configured correctly to ensure successful implementation of the TDL feature.
The following scenario describes the chain of events for a tactical data message over an HLA network:
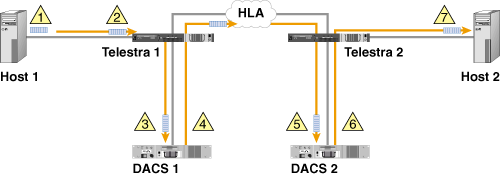
A host computer generates a TDL message.
NOTE: The format for HLA is similar to the Signal PDU format under DIS with the exceptions noted below.
The host sends this message to Telestra using the IP Address of Telestra's host interface and the UDP port number using the algorithm described below.
The transmitting DACS determines if the Entity and Radio ID's from the message match any radios.
If a match is found, the designated radio, provided it is on and set to transmit data, transmits the message over the HLA network.
The message is received by any in-tune and in-range radios on the HLA network.
The receiving DACS sends the tactical data message to its host computer.
The receiving host processes the message.
NOTE: The following configuration instructions are in addition to the instructions configuring the radio object for data transmission described in Part I of this Application Note.
NOTE: The following steps require that the command "HLA = ON" appears in the configuration file.
It is recommended that the user have the Model Builder Reference Manual on hand when configuring objects in the MB environment. The Reference Manual has information regarding configuration of the ethernet interfaces on the DACS.
HLA network >> Options >> Signal PDUs
Use the arrow keys to highlight the "Data" field then use +/- keys to change to "Data+RX" if you want to couple the data and receiver PDUs to the host.
Use the arrow keys to highlight the blank field next to the "Data" field and use the +/- keys to change the field from blank to "Voice". This sends the signal PDUs to the Host Interface for debugging as well as the communications model.
NOTE: Do not set the broadcast IP address or the UDP ports for TDL. These are automatically set to the correct values once the HLA data bridge is enabled and changing these default values will cause the TDL to fail.
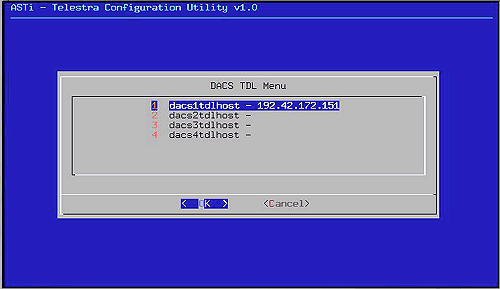
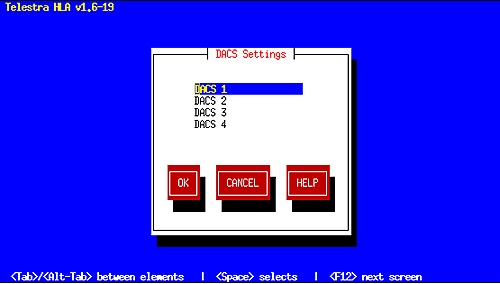
The user must specify the pairings between the DACS units and the hosts using the Telestra Configuration Utility. This mapping allows the DACS and the host to remain functionally attached even though they are not physically connected.
NOTE: The following configuration instructions are version-specific. Please follow the appropriate set of instructions.
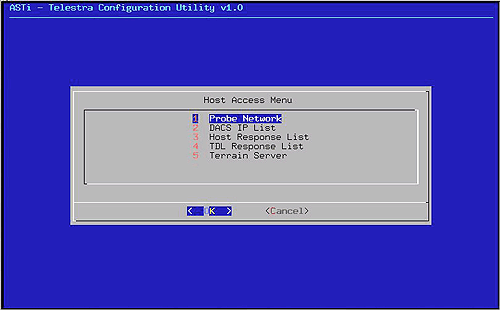
The Telestra Configuration Utility modifies several configuration files within Telestra based on inputs from the user into the utility. These inputs are written to the files when the user saves their changes upon exiting the utility and loaded into Telestra when the system is rebooted.
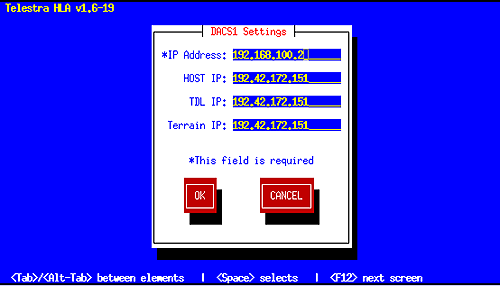
NOTE: The "IP Address" field specifies the network address of the selected DACS. The "TDL IP" field specifies the network address of the TDL host to be assigned to the selected DACS.
In Telestra versions 2.0 and later, the ASTi HLA Communications software is integrated with the Telestra web interface. The Telestra web interface is a specialized web server that provides complete sight and control of all ASTi devices on the simulation network. HLA parameters are configured using a standard web browser from anywhere on the network.
Please reference the latest ASTi Telestra v2.x User Guide for detailed instructions on how to configure the TDL network settings for HLA.
The fed file containing ASTi SOM has a corresponding convert file that defines the valid user protocols used for TDL messaging. The default user protocol values that are defined in the convert file are 6661, 6662, 6663, and 6664. The following lines in the convert file define the user protocol values:
tdl, enum, 6661
tdl, enum, 6662
tdl, enum, 6663
tdl, enum, 6664
The convert file resides in the '/home/hlauser/fed' directory on Telestra. To add a new defined user protocol, simply create another line in the same format with the desired value and save the convert file to a new name. After saving the convert file, specify the name of the modified convert file for a given federate through Federate Settings of the Telestra Configuration Utility. Please refer to the Telestra User Guide for detailed information on how to do this.
The TDL host computer must generate Signal PDUs containing the digital data. The required PDU format follows the DIS standard. The required values of the PDU fields are as specified in Part II of this Application Note with the following exceptions:
When TDL is used with Telestra, the host computer sends the Signal PDUs to the Telestra host interface instead of the DACS host interface. To do this the host computer must send to the IP address of the Telestra host interface and the UDP port number that corresponds to the DACS (1,2,3, or 4) to which it is transmitting. The port addresses that the host references use the following format:
5410X
... where X, which ranges from 1 to 4, indicates to which DACS connected to the Telestra unit the data is routed.
Similarly, tactical data responses are returned to the TDL IP address specified in the Telestra Configuration Utility. Telestra determines the correct port number based on the IP address of the responding DACS box. For instance, all responses from DACS #3 will go to the DACS #3 TDL IP address and port number 54103. With this configuration, a single host may interact with multiple DACS behind the same Telestra unit.