ASTi Logo

Telestra App Note

Restoring Models in Telestra (#82)

Step 2: Uploading and Restoring Sound Files

The sound files are saved separately from the Project; therefore, you must upload the files separately

  1. Navigate to the Telestra web interface Configuration > Backup Restore and select “Restore System Configuration,” this opens another Telestra web interface screen.
  2. At the bottom of the screen you will see “Upload Previous Backup File.” Select the “Browse” button to browse and select the file on the workstation or computer. Then select “Open.”
  3. Select the “Upload Backup File” button.
  4. The new file will now appear under “Existing Backup File.” Select the “restore now” link next to the file name.
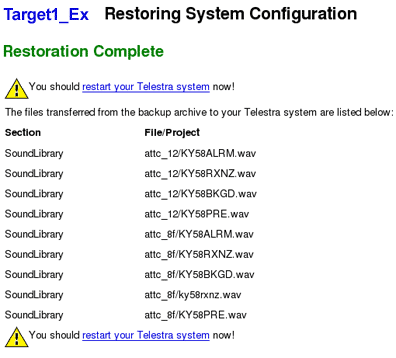
  5. The next screen asks which files you would like to restore, check the box for Sound Library and select the “Start Restoration” button. Wait for the confirmation screen to display “Restoration Complete.”
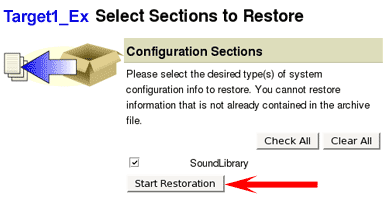
    Sections to Restore screen
    Sections to Restore screen
  6. Select to “restart your Telestra system.” Then select to reboot and wait as the system reboots. This will take approximately two minutes. Upon reboot, the Telestra web interface will automatically redirect to the System > Status.