There are two main steps to building a simple sine wave. The first step is creating the model and the second step is attaching the audio distribution software components (this tutorial uses the ACU for audio distribution).

Open the Studio software on the workstation.
Open a new Studio Project by selecting Project in the menu bar.
Selecting Project will open a screen showing all the Telestra servers on the network. The user can expand each Telestra server in the list to view the Projects located on each Telestra server. The user can either select an existing Project or create a new one.
To create a new Project, select a Telestra server in the list and hit the plus symbol(+). Name the new Project.
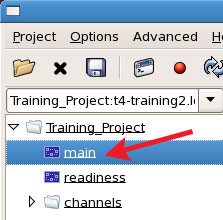
Click on 'main' under Projects to view the Layout.
Main is the default Layout icon view of the Project. Users can also add a new Layout and start with a blank canvas. Then add each item one-by-one.
Select the 'Install Layout' button. 
By selecting this button, the user installs the contents of the Project onto the designated Telestra server, where it will continue to run as the user builds the model.
Right-click the Telestra server icon in the Layout and select 'Edit' to open the 'Telestra Editor' screen.
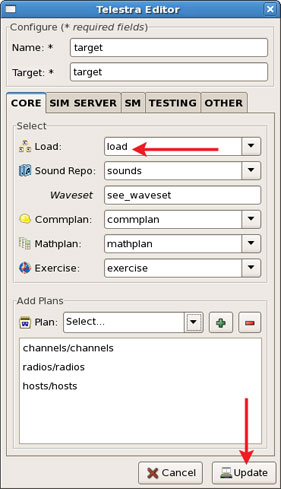
Select a Load from the drop down menu and select the 'Update' button.
Right-click on the Telestra icon in the Layout and select 'Open' to open the load.
Right-click in the Load canvas and select 'Add'.
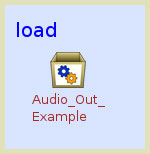
Select 'Sim Model' and name it Audio_Out_Example. This create the model canvas.
Note: When naming files, use the underscore (_) instead of spaces.
Double-click on the 'Audio_Out_Example' model icon to open the model.
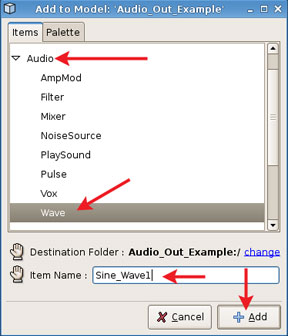
Right-click in the canvas to add an item, expand the Audio tab and select the Wave component. Name the component Sine_Wave1. Then select the 'Add' button.
Save the Load and execute the Layout.
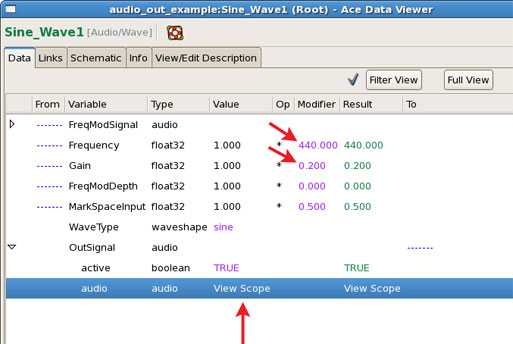
Double-click on the Sine_Wave1 to open the Data Viewer for the component. Set the Frequency by changing the modefier to 440.
Set the Gain modifier to 0.20.
Expand the OutSignal to view the scope.