
The following tutorial demonstrates the use of a playsound component and the sound library by creating a simple playsound model. The playsound component provides the ability to play digitally encoded soundfiles. Sounds that have no dynamically varying elements (except for overall volume level) are best handled as fixed off-line recorded sound files (e.g. Missile launch)
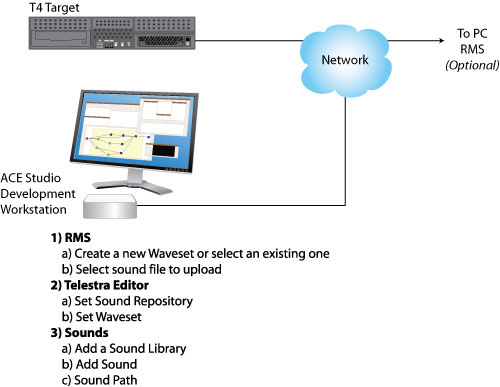
In the Telestra web interface, the Uploading Sound Files page provides a two-step process to uploading sound files on the system. The user must first select a waveset or create a new one. The waveset is a folder that contains the soundfiles in the sound repository. The selected sound files are then uploaded to the waveset folder
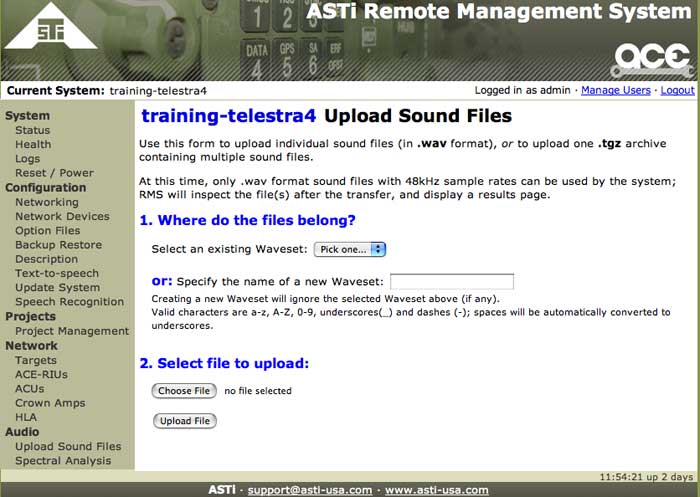
Important: All soundfiles must be in the following format: 16-bit PCM MONO WAV files with a 48khz sample rate. The Telestra web interface will give you an error if the file is not in this format
In the Project Manager > Sound Repositories, right-click to add a new sound library and name it accordingly. Open the Sound Library Editor and add groups, as necessary, to the library. The groups provide organization of the soundfiles
To upload sound files to the Telestra server open the Telestra web interface and navigate to the Audio section. Open the Upload Sound Files page and follow the instructions to add individual . wav files or upload one .tgz archive containing multiple sound files
Important: All soundfiles must be in the following format: 16-bit PCM MONO WAV files with a 48khz sample rate. The Telestra web interface will give you an error if the file is not in this format
To locate soundfiles on the Telestra server you must 'ssh' into the Telestra server. From the Studio Project Manager right-click the Telestra server icon in the layout and select 'ssh'
In the command line type the following:
cd var/local/asti

or

cd var/local/asti/soundfiles/<waveset>